I hope you have a few minutes to spare as I am afraid this is a bit of a large post, mostly due to the considerable amount of photos! I worked on this album for a full 6 days as I was commissioned for an 18th birthday. I did have to scan and re-print virtually all the photos which took quite a bit of time.
For this album I have used papers called
Lime Twist from
My Mind's eye collection. I love their stuff and since I only just acquired this pad it was a perfect opportunity to put the papers to good use. Actually saying that the front cover and back cover papers are from the same designer but from the
29thStreet Market pad.
You will have recognised the
Tim Holtz Hardware Finding die cuts which were heat embossed first with silver powder then gold. I sanded them to make them look old and rustic and inked with crushed olive and walnut distressed inks.
The numbers are wooden which I tinted with walnut distress ink and then added ModPodge for shine. The metal letters for the name are from Making Memories - I think - but the label is no longer present so I can't be sure.
The wired word "Happy" is my own creation and the metal coggs, chains, keys and pin are charms which I had in my jewellery stash!
There are a lot of tags added for the owner to put their own comments so some of them were left blank or with little decoration. The boys' mother wanted some places were she could write dates etc and I think I gave her plenty of that.
This booklet actually opens up and has a pocket which contains tags left blank.
The lad is crazy on apple computers so I created his own mini Macbook which closes with velcro and has a picture of him when he was small.
These last two pages were left blank so he could add photos from his 18th birthday party. His mother loved the album so much that she made me add two further pages as she hadn't given me pictures of herself with the baby and she felt left out!
Unfortunately I forgot to photograph them...
I did have a major nightmare when it came to binding because with all
these pages I didn't have a bind it all wire big enough! Luckily I had
those metal rings left over from another project and since they were
quite large they fitted perfectly. The added advantage is that they open
so when the mum wanted to add pages it wasn't a problem!
Anyway that's all folks so I hope you enjoyed it as much as I enjoyed creating it. Thanks to all of you who gave me ideas for the embellishments which in the end I kept fairly minimal since the papers were so vibrant.

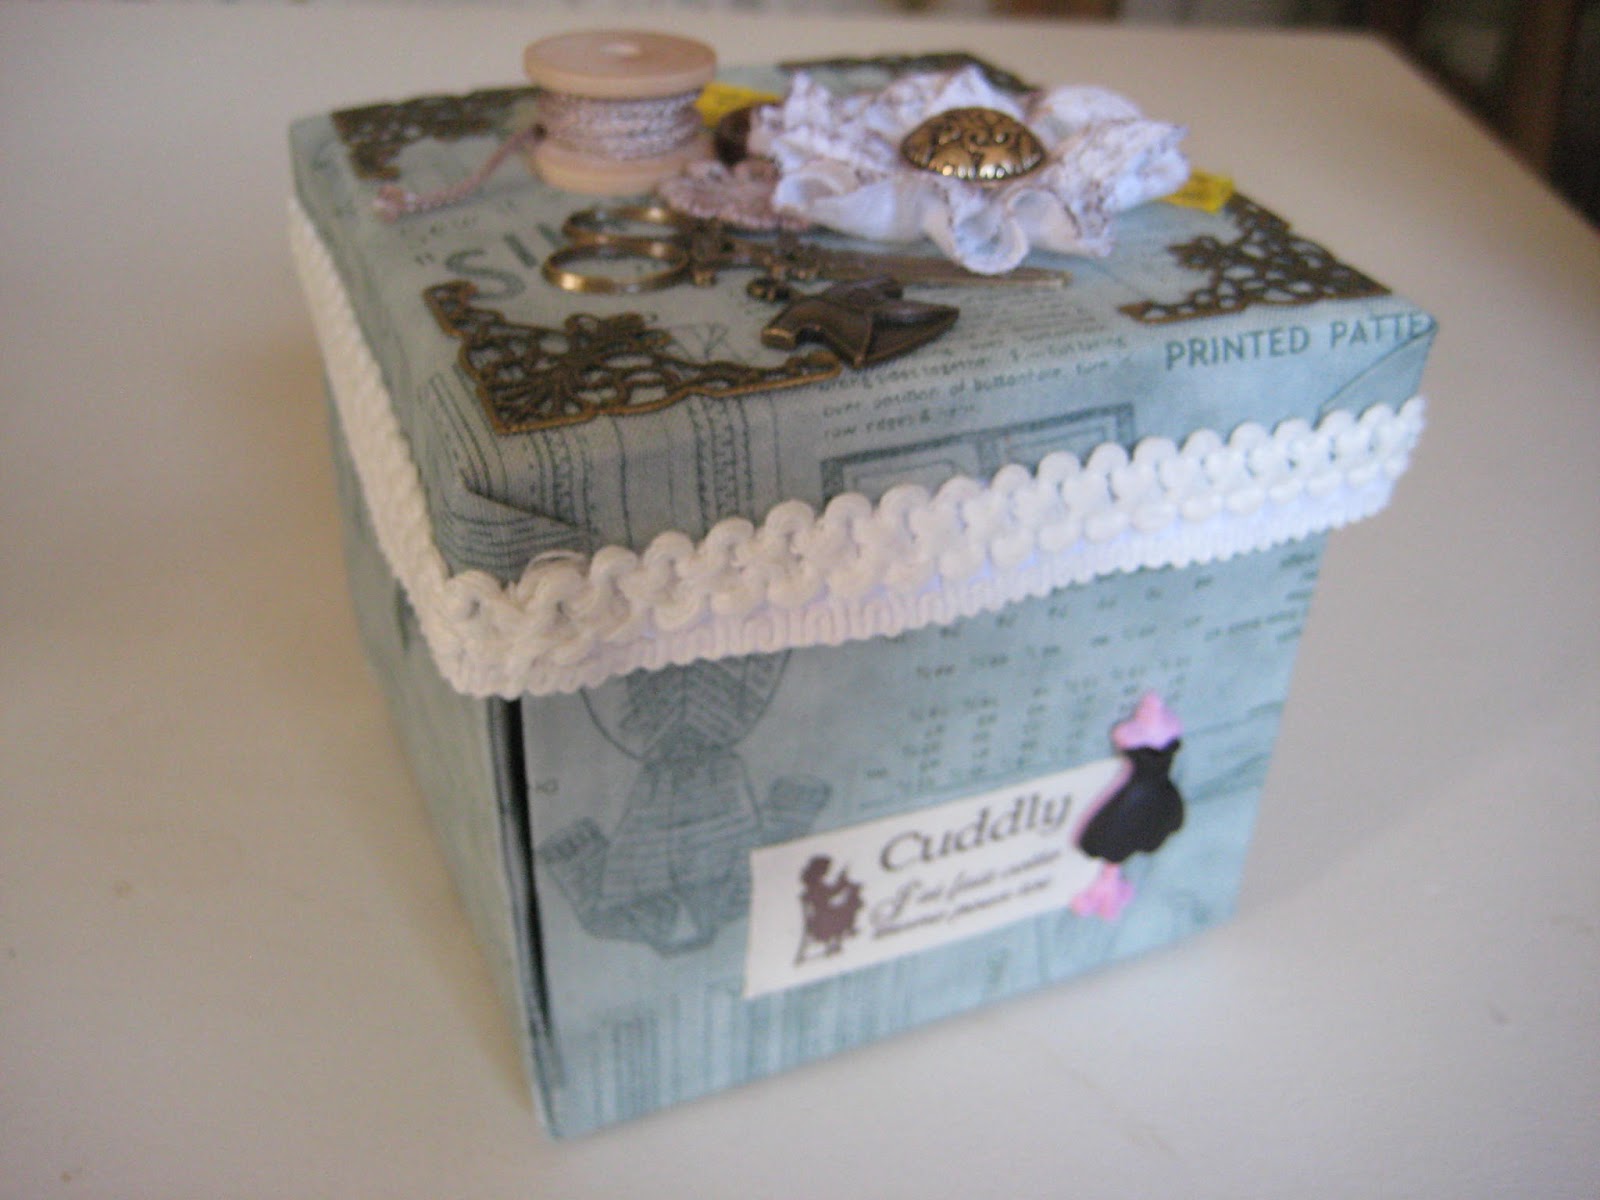
 I wanted to make a nice present for a friend of mine with whom I share birthdays and since I know she likes sewing I thought of this little box. She has not got a lot of room where she lives at the moment so I didn't want to lumber her with a great big thing and thought this little version would be perfect. Now lets hope she likes it. It's made out of a 12x12 piece of card and recovered in fabric. I have also added a bit of padding on the inside to make it more lush and so she can use it to prick pins when she's not using them. I haven't given it to her yet, so let's hope she'll like it (and that she doesn't read this before I give it to her or that could seriously kill the surprise!). She's away on holidays at the moment so I think I m safe....


