Saturday 23 November 2013

Mini Bag Pack

I have been so busy with studying those last few months that my crafting time has gone out of the window, I have however managed to get some sewing done and apart from a few skirts for my daughter which I might post another time I did get this little bag done. I was made with the left over material from the armchair I recovered in the spring and bits and pieces from my stash so no cost at all. I hope you like it. I may even post a tutorial at some stage but for now you just get to look!


Sunday 14 April 2013

Sewing box

I wanted to make a nice present for a friend of mine with whom I share birthdays and since I know she likes sewing I thought of this little box. She has not got a lot of room where she lives at the moment so I didn't want to lumber her with a great big thing and thought this little version would be perfect. Now lets hope she likes it. It's made out of a 12x12 piece of card and recovered in fabric. I have also added a bit of padding on the inside to make it more lush and so she can use it to prick pins when she's not using them. I haven't given it to her yet, so let's hope she'll like it (and that she doesn't read this before I give it to her or that could seriously kill the surprise!). She's away on holidays at the moment so I think I m safe....


Wednesday 10 April 2013

Just like new!

I saw this chair on the side of the road one morning when taking the kiddies to school. Well actually there was two of them, but by the time I came back the best one had been snatched already so I decided I couldn't possibly leave this one lonely, all by itself, abandoned to the element! I am kind like that you know... Anyway, I brought it home despite a suspicious smell rising from it - it must have been left somewhere damp or something dampened it... (does not bear to think about what that could have been ...). I fully intended to deal with it there and then, but then time is not something I have in abundance so it just got left in the lounge covered up in a blanket to hide its sad condition. I have been looking for a nice material to recover it but since it was my first armchair recover of this type I didn't want to pay a lot and find that I messed it up. So I went for a simple stripey canvas bought at the Birmingham market for the bargain price of £16! "That will do for my first attempt" I thought... and if it came out rubbish, I wouldn't be crying in the leftovers..."

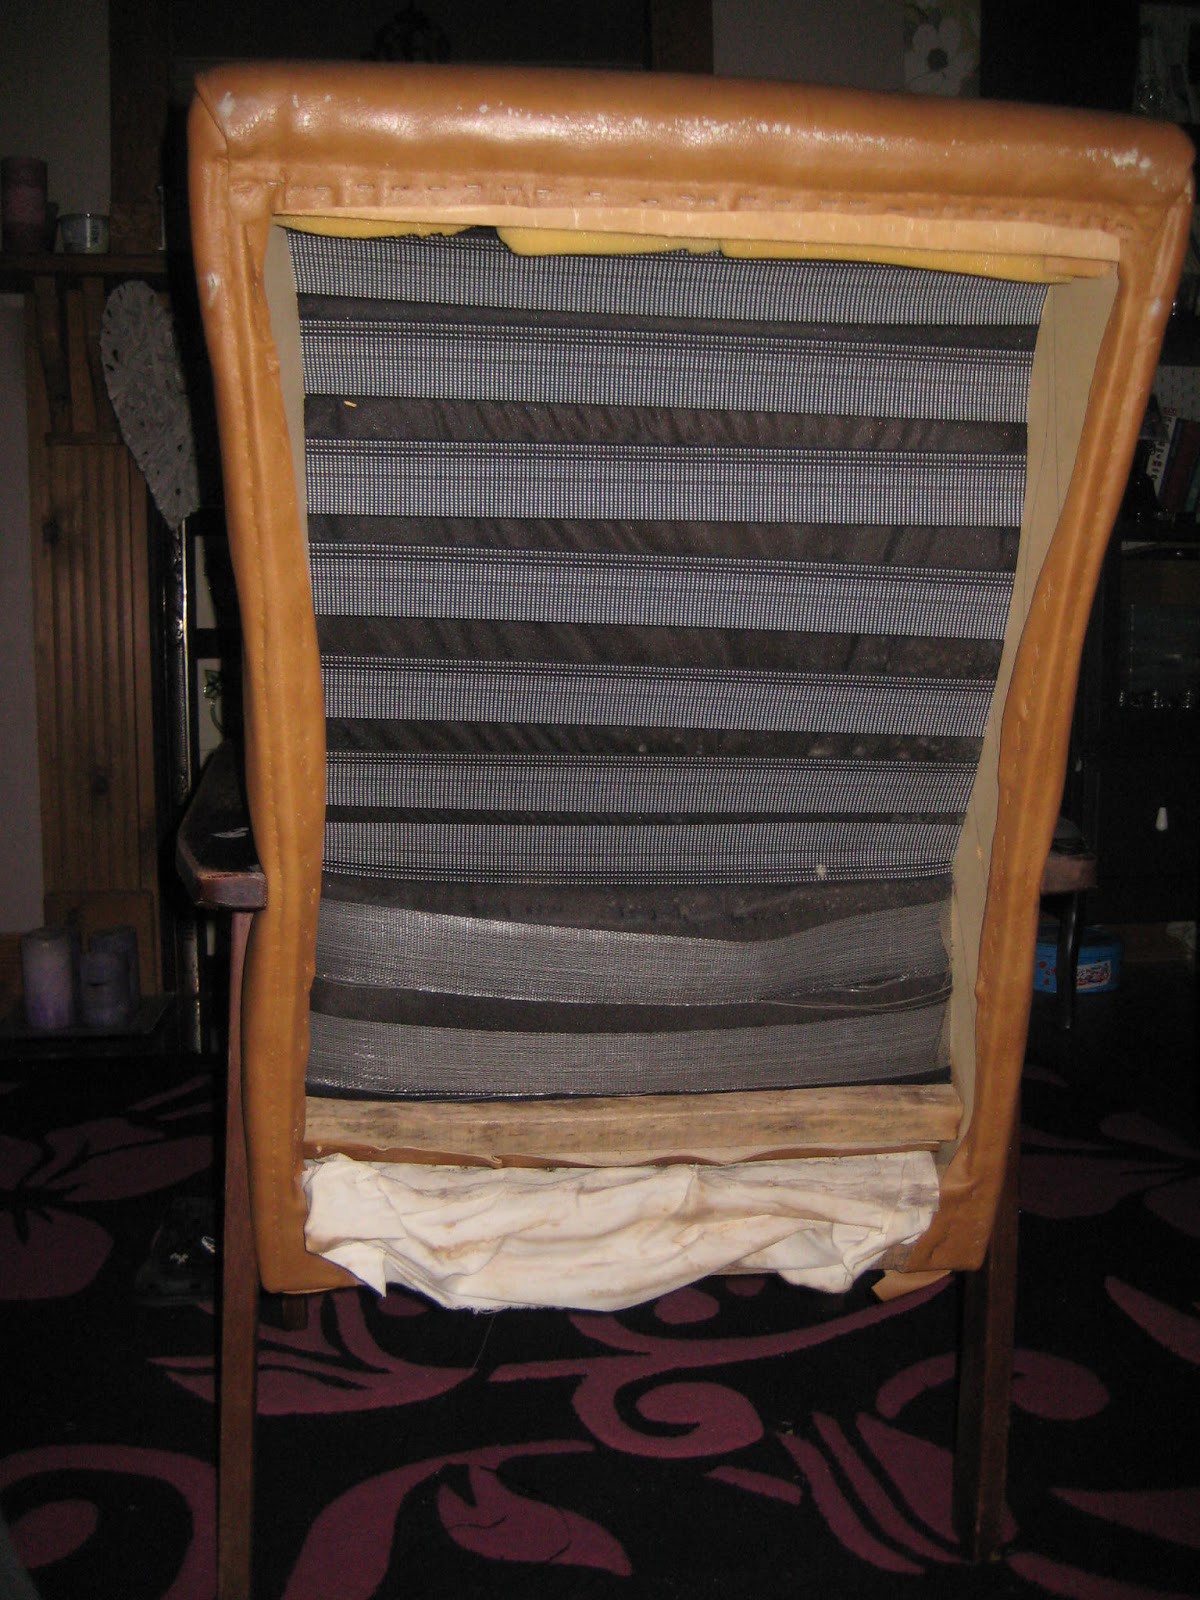
As you can see it was in desperate need of a makeover!


After 3 (long) hours taking all the staples off the upholstery I finally got to this ....


My daughter primed the frame ( not a very good job but she has to learn right?) and I finished it in Laura Ashley "truffle". It give it a kind of beach wood look which goes well with the fabric. Lucky, as I already had the paint so I didn't have to buy anymore!

It was also my first time at making and using piping. I had a few tribulations - my machine started to sew backwards just to p... me off  and wasted a good hour of my time whilst I was trying to work out why the sudden whim. Just as I was resigned to have to sew the whole thing in reverse gear, it started going forward again!! I hate my sewing machine, it was expensive and yet it is the most unpredictable and unreliable piece of crap I have ever owned. My previous one cost me £90 and lasted me years without an itch (until my son dropped it on its head, that is!). This one cost me over £250 and I have never been able to just set it up and start. It hates fine fabrics and don't even ask it to do a button hole!!! Anyway I diverge....

See my excellent piping, sorry I have to boast as I have always shy ed away from piping before!


And here is the result of the finished product. It doesn't go with my bedroom wallpaper but its not meant to stay in this room, so it doesn't matter.


and here is what it looks like with a bum on it!


I am not sure the material I used would last long with heavy use, but it is to go in my youngest daughter's room when it's done up (eventually, maybe before she's 18... she is 12 at the moment!) so it will last at least until she gets bored of it!


Thursday 4 April 2013

Not quite papercrafts!

David had been moaning that I have taken over the office with all my craft stuff and that he had nowhere to put his things. To which, I couldn't help pointing out, that most of his stuff is rubbish that needs sorting instead of piling up .... but then I took one look at my office and thought ...kettle.... pot.... black.... you know what I mean...!
Anyway I was fed up of his stuff hanging around the kitchen worktop, the top of the kitchen cupboards, in the wine rack (!!) - you get the picture - so I decided that I would find him his own space and filing area. He doesn't have as much as me, since I file all the house bills, so it's strictly for HIS papers. I started to look on ebay and found this bureau which was badly photographed and hadn't had any bids. Lucky for me! so I swooped in and hey presto, I won it! (for once that I win something - when I say win, it did cost me 25 quids but still...)
So here it is in all its glory before (this was the photo used on ebay - see what I mean about poor photo?!
Still it didn't look bad enough to deter me from snapping it...


So I started by sanding it roughly to get rid of the varnish finish and allow the paint to take on better. I wanted to use Annie Sloane chalk paint to save on time and primer but unfortunately there are no local stockist near me in Birmingham so I decided to prime it and use Farrow and Ball paint instead. Since I am French I thought French Gray would be most appropriate -especially since it matched some of the colour in my wallpaper! 


I hate sanding but it is important when you prime to make sure you get a durable finish. Farrow and Ball in particular is quite unforgiving if you do not prepare your surface properly.  Since i don't fancy doing this again for a long time , it was worth putting in the elbow grease at the start...


Once the unit was primed, the worst was done and I just gave it two coats of paint to get my final result. I am still not quite sure it is going to stay quite like this. I quite fancy adding some vintage french writing on the door, and maybe a brownish glaze to give it some dimension.  However, for now, it will do as I have plenty of other things to do.  At least it blends in the decor of the room, so for now that's good enough for me! If I do any changes you'll be the first ones to see,  I promise!! 


Wednesday 3 April 2013

La Ronde de Noel

Ok, I know! I am indeed very very late in showing you this considering this was my interpretation of la Ronde de Noel for Les ateliers du scrap. Still you know what they say , better late than never! I have been soooo busy and still am so I have a few more things to add to the blog but will have to find the time to add them between two exams or essays to write! For now I hope you enjoy this lot!


Tuesday 22 January 2013

Jewellery box


A little jewellery box created from cereal boxes , docraft paper flowers as well as flowers created with various sizzix dies. The owl stamp is from Leane Creatief  and the papers I used are my mind's eye "29th street market". The hinge is actually a brad from seven gypsies. It is about the size of a large card so ideal for decoration on a chest of drawers in a little girl's room (which is exactly where it's ended up I hear!).


Sunday 20 January 2013

White corset card


This one was for my mums birthday. She loves dancing and I thought the "skirt" looked very dancy! The body is cut from a template (you can find it on my template page) and was embossed with a sizzix folder (flowers). The fringe and ribbon are from my stash which I normally get in Birmingham rag market. The only thing with this particular card is that you have to enclose a separate little note that you slip in from the top so you don't have to open the ribbon at the front. You could however modify the template and make the card open at the side instead. Up to you folks!